
Proper screen exposure is vital to getting that perfect print. Purchasing an exposure unit can be pricey. There’s one option that many printers turn to: the power of the sun. You can use the sun as your exposure unit. But should you? Let’s go over how to expose a screen in the sun and potential issues you might encounter.
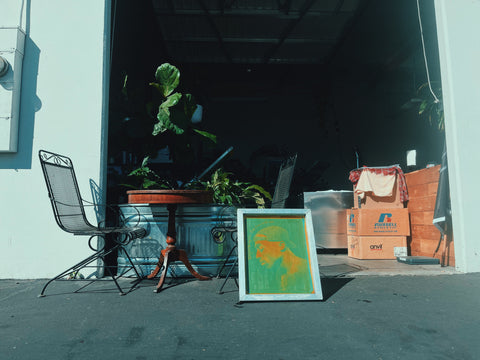
Photo by Black Print Ink.
WHAT YOU’LL NEED
To use the sun to expose screens, here are the factors you’ll need to look at to set yourself up for success.
THE SUN
This seems pretty obvious, right? If you live in a sunny place, you’ll have better luck at planning days to expose your screens. Make sure the sun is out at full strength when you go to expose.
The best time to expose a screen using the sun is at noon on a sunny day. You’ll get the most concentrated sunlight at that time. Make sure that you choose a sunny day to expose your screens, or you’ll get disappointing results. Check the UV index on your weather app to coordinate the best days to expose your screens. The higher the UV percentage, the brighter the exposure “bulb” will be. Take notes on the days you expose screens so you’ll have a log to reference.
DUAL CURE EMULSION
When using the sun as an exposure unit, it’s best to use a dual cure emulsion, like Baselayr Long Lasting. It’s more forgiving, and you’ll be able to expose a good screen without needing the perfect environment.
POSITIVE CONTACT
Positive contact is important to properly expose a screen. Exposure units come in either compression or vacuum form, which create positive contact between the light source, glass, film, and emulsion. Having that tight, strong contact results in a clean, sharp image on the screen.
If you’re using the sun to expose screens, you obviously can’t place weight on top of the screen, like you would with a compression unit. That would block the sunlight from reaching your screen. Instead, use something transparent, like a piece of glass, to create some positive contact with the screen. It isn’t perfect, but you’ll get a better screen with contact than you would without.
RELATED: HOW TO GET THE BEST COMPRESSION ON AN EXPOSURE UNIT WITH NO LID
Now that you’re prepped, you’re ready to expose it.
HOW TO EXPOSE SCREENS IN THE SUN
Joey Avila, owner of Avila Design Co., used to expose his screens in the sun. He followed a YouTube video, and eventually was able to get his exposure pretty well dialed.
Here’s four steps to expose your screens to the sun.
STEP 1: CHECK THE WEATHER
If you expose screens without enough sunlight, you won’t get good results. Underexposure is most common, and you’ll lose a lot of detail. Make sure that the sun will be out when you’re ready to expose. If you live in a rainy climate, this may be difficult to plan. You may have to plan jobs around the weather.
STEP 2: GET THE SCREEN OUTSIDE
You don’t want to start exposing the screen before you get outside. When leaving your darkroom, wrap the screen in something that won’t let light through. You can put it in a cardboard box, wrap it in a black trash bag, or find another creative solution. As long as the screen is safe from any light while you’re transporting it outside, you can be as creative as you want.
STEP 3: SET UP THE SCREEN FOR EXPOSURE
Lay the screen in the sun, facing up. If you’re exposing screens on blacktop, place the screen on a piece of cardboard so the light doesn’t bounce up from the dark surface.
Remember that piece of glass mentioned earlier? You’ll need that now. Set the glass on top of your screen to create positive contact.

Photo by Two Rare Design.
STEP 4: EXPOSE
Depending on the sun conditions, you might only need two minutes to expose the screens. There isn’t a sure-fire way to dial in your exposure times, as weather conditions sadly aren’t controllable. However, you can test exposure a couple of ways.
To discover which length of time is best for exposing a screen, grab a piece of cardboard, a book, or something else that won’t let light through. At the two minute mark, place the cardboard over the top third of the screen. Let two more minutes go by, and then cover the next third. When six total minutes are up, take the screen to a washout booth and wash it out. You’ll be able to see which time worked best for your screen. Check for detail resolution when rinsing out your screens, and check for scumming emulsion. This is a sign of unexposed emulsion.
Another way to test exposure times is to grab an exposure calculator and set it on the screen during exposure. When you wash the screen out, the exposure calculator will tell you how well the screen has been exposed. You’ll want to get to a solid step 7 for best exposure and detail resolution.
RELATED: HOW TO DIAL IN EXPOSURE TIMES USING AN EXPOSURE CALCULATOR
Using the sun seems like the perfect way to expose screens without breaking the budget. It can work really well, but it also has some issues.
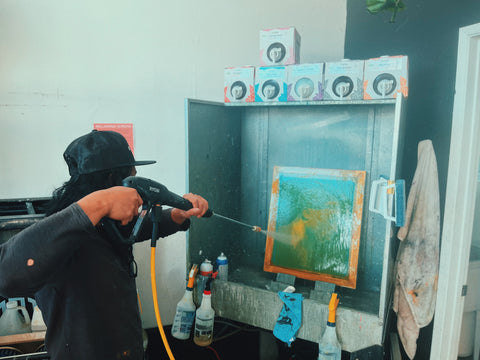
Photo by Black Print Ink.
POTENTIAL ISSUES WITH THE SUN EXPOSURE METHOD
First and foremost, exposing screens with the sun requires, well, the sun. If you need to expose a screen, but the weather is cloudy, you can’t do anything about it. You’ll have to plan exposure days around the weather, which can be unpredictable. You can use the sun’s UV index to track exposure times. Make sure to take notes on good and bad exposure days so you have a baseline for exposing with the sun.
Say you have a job due in a week. You exposed the screens needed, but realized that one of them didn’t expose correctly. You check your weather app to see that it’s supposed to rain for the next five days. There’s nothing you can do but wait until it’s sunny again. Trusting your screen exposure to the weather can add a lot of stress to your darkroom process.
Joey experienced some of this stress when trying to expose his screens using the sun.
“It was always a battle against the weather. I would have to plan out days ahead of time to make sure I was burning screens on days where it wasn't too rainy or cloudy,” Joey said.
So let’s say you managed to find time at noon on a sunny day to expose screens. You wash them out and notice that the fine details haven’t rinsed out well. While it’s possible to expose fine detail with the sun, it isn’t easy. Remember that positive contact mentioned earlier? Well, the more positive contact you have, the better detail you’ll be able to expose.
SOLUTIONS
Maybe exposing your screens in the sun isn’t working for you. One solution to this is to move to a sunnier climate. Who doesn’t want a tan?
Ok, for real though. If you’re not interested in picking up your life and moving to Florida, finding an exposure unit is the best way to solve the problems you’ll run into by using the sun for exposing screens.
RELATED: HOW THE X1620 EXPOSURE UNIT WILL ELEVATE YOUR DARKROOM
This doesn’t have to be an expensive fix. You can jump in and buy a vacuum exposure unit—you’ll thank yourself in the long run—but if you’re on a budget, getting a compression unit is a great solution too. If you’re not ready for a compression unit, a DIY bulb might do the trick for you as well, especially if you live in a rainy climate. You’ll have a stable light source that you can control.

Photo by Black Print Ink.
Exposing screens with the sun seems like the perfect method. In reality, it’s rarely perfect. Shops in sunny climates have the easiest time exposing screens in the sun, but it’s possible anywhere with a little planning and patience. If you don’t want to wait for the weather to get started on jobs, an exposure unit will be your best friend.


