
Wet-on-wet printing can save printers a ton of time since they do not have to wait on the flash. However, wet-on-wet printing is a technique that isn’t mastered overnight. You have to know how to do it, and that means practicing. Want to dip your toes into the world of wet-on-wet printing? Here’s a crash course on printing wet-on-wet directly to t-shirt fabric.

WHAT IS WET-ON-WET PRINTING?
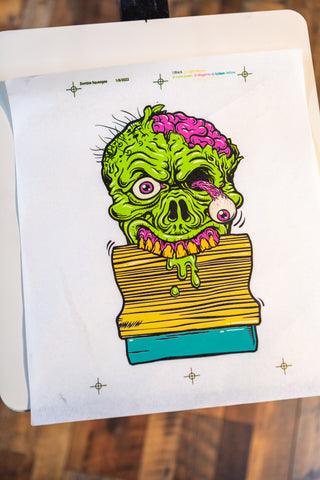
Wet-on-wet printing is what it sounds like—printing a new color of ink on top of or next to a wet layer of ink. When printing wet-on-wet printing, you don’t flash between every color.
Printing wet-on-wet has many advantages, like keeping pallets cooler and speeds up production, but there are times when it isn’t beneficial to use this technique. Let’s dive into the pros and cons of printing wet-on-wet and how to do it successfully.
WHY PRINT WET-ON-WET?
One of the many benefits of wet-on-wet printing is that it allows you to potentially skip flashing altogether, which can save you time in production. It also creates a thinner, more flexible print. Color blends will be superior as opposed to flashing after every color (be warned, though, you can lose detail if you’re not careful). If you’re looking to speed up production or want to try a new technique to achieve softer prints, you should experiment with wet-on-wet printing.
DRAWBACKS OF PRINTING WET-ON-WET
As with most printing techniques, wet-on-wet printing can have its drawbacks. The biggest drawback when printing is fibrillation after the wash. Fibrillation happens when shirt fibers and threads are fluffed up and start to unravel so they stick up through the print. It typically occurs after laundering the shirt. Standard cotton fabrics (carded open-end) are more prone to fibrillation while ring spun fabrics are less likely to experience it. Wet-on-wet printing increases the likelihood of fibrillation because flashing does not occur. Flashing seals the shirt fibers under the ink layer. There’s nothing to stop the fiber ends from sticking up through the ink layer.
If you’re printing a dark color straight on to white or light-colored fabric, the ink color can begin to look faded after washing as the fibers release. Higher contrast colors will look more faded after a few washes than low contrast colors. Imagine you’ve printed a bumblebee on a white t-shirt. After a few washes, the black ink will appear to have faded more than the yellow ink. Neither ink has actually faded, but the high contrast of white fibers poking through black ink makes the black look more faded in contrast to the yellow.
Fibrillation can create vintage, faded prints. If your customers are happy with it, go with it! However, if your customer is expecting a vibrant color that won’t experience fibrillation, flashing between colors may be your best bet. This can also be called “strategic flashing.”
RELATED: HOW TO SCREEN PRINT WET ON WET HALFTONES AND COLOR BLENDS FOR A VINTAGE LOOK
Decided that you want to pursue this rad technique? It’s time to learn how to do it.

PRINTING WET-ON-WET: THE BASICS
The best way to learn how to print wet-on-wet is to test it out. Do not try it in production until you know the basics and have practiced the technique. If you dive into it head-first during a job, you’ll likely end up frustrated and in over your head. Practice using shop shirts or discount shirts, or use the screens from another job with higher mesh count to hone in your skills. You can even find a design you’d like to test out wet-on-wet printing with—including your logo.
When printing wet-on-wet, water-based or plastisol inks work. There are some differences when printing wet-on-wet with plastisol versus water-based, but for the most part, the processes are similar. Let’s take a look at a few key variables to consider when printing wet-on-wet.
TRAPPING INK
Don’t print wet-on-wet if you need to trap or overlap colors. If you trap the ink, you will see some color shift or blurring in the area where the inks overlap. For example: if you were to print yellow directly on top of red, you’ll have an orange outline. In order to avoid this, you’ll need to do butt registration. To do this, separate your art so the colors barely touch each other on the edge, or butt up against each other. This will help you to avoid that color shift outline.
Registration is key when printing wet on wet. If you don’t register your screens correctly—or if your press shifts during a job—you’ll get a blurry outline no matter how well you separated the art. Make sure your registration is dialed in. Practice makes perfect.
MESH COUNT
Mesh count is also vital. Printing wet-on-wet directly onto a shirt requires a high mesh count. Use 180 to 230 mesh counts for wet-on-wet jobs. If you’re just starting out, go for the higher mesh counts, around 230, for all your testing. As your wet-on-wet skills improve, you can start to use the lower mesh count screens. Use higher mesh count screens earlier in the job, and lower mesh count screens later. This way, you’ll control the amount of ink on the shirt—and the back of the screen. It’s normal for ink to transfer to the back of the screens during a wet-on-wet print job. However, make sure the ink isn’t building up on the back of the screens during a print run. If this happens, it may be user-error—i.e. the ink deposit is too heavy—or the ink isn’t formulated for wet-on-wet printing (more on this later). High mesh counts will help control and slow down ink buildup.
RELATED: MESH COUNT AND YOU
SQUEEGEE DUROMETER
Squeegee durometer matters. When printing wet-on-wet with plastisol ink, use harder squeegees like 70/90/70 to help control ink deposit thickness.
If you’re printing water-based ink, use normal squeegees like 70 durometer. Since water-based ink is thinner than plastisol ink, you don’t have to be as concerned about ink deposit thickness.
RELATED: HOW TO CHOOSE THE PROPER SQUEEGEE BLADE DUROMETER

WATER-BASED WET-ON-WET
Water-based ink penetrates the fabric better than plastisol. Most water-based prints can be printed in the 200 mesh range. This allows you to lay the appropriate amount of ink without oversaturating the garment, which can lead to blurring. Most water-based ink won’t build up on the back screens during a run.
There’s another ink type to try though: plastisol ink.
PLASTISOL WET-ON-WET
Plastisol ink doesn’t penetrate the fabric as easily as water-based ink does. It’s also more viscous, meaning it’s more solid than water-based ink.
The biggest question to ask yourself before printing wet-on-wet with plastisol is whether the ink is designed to print wet-on-wet. Many inks are formulated for wet-on-wet printing. Contact your supplier if you have any doubts or questions.
If the ink you’re using is not properly formulated, you’ll need to use additives to minimize ink sticking on the back of the screens. Fashion Soft, Sentri Clear and Chino Base are great additives to use for this purpose. While these additives will help to create a thinner ink deposit, it’ll behave more like a lubricant to help stop ink buildup.
When printing wet-on-wet with plastisol ink, you’ll want to lay down a thin, controllable layer of ink. The ink needs to be as smooth and creamy as possible. To do this, you’ll want to modulate the ink. “Modulating” is just a fancy word for “stirring.” Yes, even short-bodied inks like FN-INK™ should be stirred. You can either stir your ink with a spatula, or grab a mixing drill bit from your local hardware store and use it for larger quantities of ink. Keeping your shop between 70°F and 80°F will also help keep your ink creamy and ready to print.
Pro Tip: Overall it’s best to print the smallest area of your design first and the biggest area last. If you print the largest area first, a lot of that ink on the shirt can be pulled up during your print run, and will be on the backs of your screens instead of on the shirts. The same practice applies to darker colors. Print them near the end of the job: you’ll pull less ink off the shirt during the run.
Try not to do extra print strokes when printing plastisol wet-on-wet. Too many print strokes can lay down an excessive amount of ink, and you’ll be disappointed with the result. If you need to do more than one print stroke, remember to control the ink deposit. Otherwise, you can get a blurry print or funny texture in your ink layer. Remember, practice makes perfect. If you make a mistake, simply learn from it and try again.
RELATED: EVERYTHING YOU NEED TO KNOW ABOUT PRINTING WITH PLASTISOL INK
Wet-on-wet printing takes practice to get good at. It can save printers time, but only when done correctly. Dial in your print shop and your wet-on-wet process, practice, and test. Before long, you’ll be a pro.