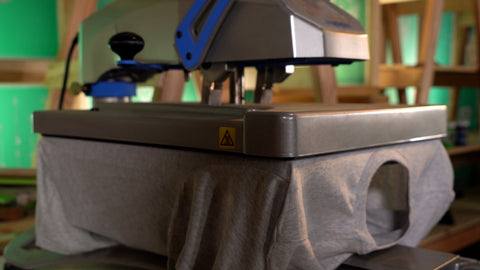
A heat press is a great tool and has tons of uses. Many screen printers start by heat pressing transfers onto t-shirts, tote bags, or other garments. Heat presses can be used to cure garments, and are great for printing at live events. Let’s talk about all the benefits of having a heat press, and what you’ll need to be successful.

WHAT ARE MY OPTIONS?
There are so many options when buying a heat press. Look it up, and you might be overwhelmed. There are hat presses, mug presses, and large and small presses. Some heat presses use a clamshell method to press, while others have swing-away heating elements.
No matter which heat press you choose, make sure it fits what you’re trying to accomplish. Are you going to be using the heat press for vinyl or plastisol transfers? Get a heat press that can accommodate an adult-size shirt. Going for specialty items, like mugs or hats? Find a press that works for your niche and have fun!
Many printers start out by decorating garments with vinyl or offer heat transfers in addition to screen printing. A heat press can do so much more than just press vinyl onto t-shirts.
RELATED: THE HEAT PRESS, EVERY PRINTER’S SECRET TOOL
WHAT CAN A HEAT PRESS DO?
There’s a reason having a heat press around can be a great tool for your shop. Obviously, you can decorate garments with vinyl or plastisol heat transfers using a heat press. If you have customers who want a few shirts over a long period of time, having a heat press is a great option. Just create the transfer and save it until that order comes around again.
Did you know you can cure ink with a heat press? It’s true. In fact, a heat press can cure both plastisol and water-based inks. It’s also the best method of curing if you’re printing at a live event because wind conditions won’t affect the final cure, as they would with a flash unit.
The heat press provides a stable heat source. It gives a readout of any temperature fluctuation while you're using it. If a shop is already printing vinyl, a heat press will be an excellent, multi-use tool.

HOW TO CURE WITH A HEAT PRESS
Curing with a heat press is incredibly simple. For plastisol ink, read the label to discover the cure temp and set the heat press to be 20-30 degrees above that curing temperature. Use light to medium pressure. Place a heat-resistant non-stick sheet on the print. Press for 20-30 seconds. Make sure you perform a wash test to double-check that the ink has fully cured.
Guess what, printing water-based is doable when you have a heat press! Set the heat press at 330 degrees with light to medium pressure. Place a heat-resistant non-stick sheet on the print. When curing a water-based print, the ink layer needs to breathe in order to evaporate the moisture. Hover the heat press right above the print to let the heat evaporate the water content. Once it is dry, press onto it for 30-45 seconds. If you add Warp Drive to the ink, press it for 20-30 seconds and set it off to the side to let it finish chemically curing the ink.
RELATED: WHY LIVE PRINTING? PRNT SCRN SCREEN PRINTING WEIGHS IN

I’M SOLD. WHAT DO I NEED?
You’re ready to buy a heat press. But which one should you buy? Standard heat presses match the average platen size: 16”x20”. This size heat press can handle all standard jobs. Press or cure neck labels, back prints, left chest prints, and more.
Looking to break into the plastisol heat transfer game? Here’s what you’ll need.
First, you’ll need to pick up some transfer paper. This is what you’ll screen print the design onto before pressing it onto the shirt. Get some transfer adhesion powder, your favorite plastisol ink, and a squeegee with a high durometer. You’re ready to create some transfers.
CREATING YOUR OWN HEAT TRANSFERS
Here’s a step-by-step guide to creating heat transfers:
- Expose the screen with the image in reverse. You’ll be printing in reverse so when you heat press, the design will be correctly faced
- Set press to 1/16” off contact, and use a vacuum platen if possible. Vacuum platens keep the transfer paper from moving around. You can use water-based pallet adhesive if you don’t have a vacuum platen, but be careful when peeling the paper off the platen. Create a jig on the platen to keep the paper in position.
- Since you’re printing on paper, lay down a thin ink deposit using a higher durometer squeegee.
- Once the design is printed, run the paper through a bin or bucket of transfer adhesion powder.
- Gel the ink to set the powder and design. Heat the ink for 6-10 seconds. Ink is properly gelled if you can easily pull it away from the paper.
- Set your press to 330-350 degrees. Place the transfer paper face down on the garment and use the heat press for 10-12 seconds while using medium pressure.
- Peel the paper back and your design will be transferred to the garment.
RELATED: HOW TO SCREEN PRINT MULTI-COLOR PLASTISOL HEAT TRANSFERS

A heat press can bring versatility to any shop. Without breaking the bank, you can offer different methods of screen printing and garment decoration, and even host live events. No matter the size of your shop, a heat press can be a great addition.

