There may be a time when a customer requests a multicolor print that requires more colors than your press can handle. Luckily, you have a few tricks you can do to make it work. Screen printing expert Colin Huggins will walk through creating the artwork for the print and how to set it up on press.
CREATING THE ARTWORK
Colin pulled the skull design from Golden Press Studio's Skull Pack. To create the blends and separations, he used his techniques he has demonstrated in previous videos like "How to Separate Halftones and Color Blends" and "How to Create a Base White in Adobe Illustrator." Check out those videos to learn more about the fundamentals on those topics!
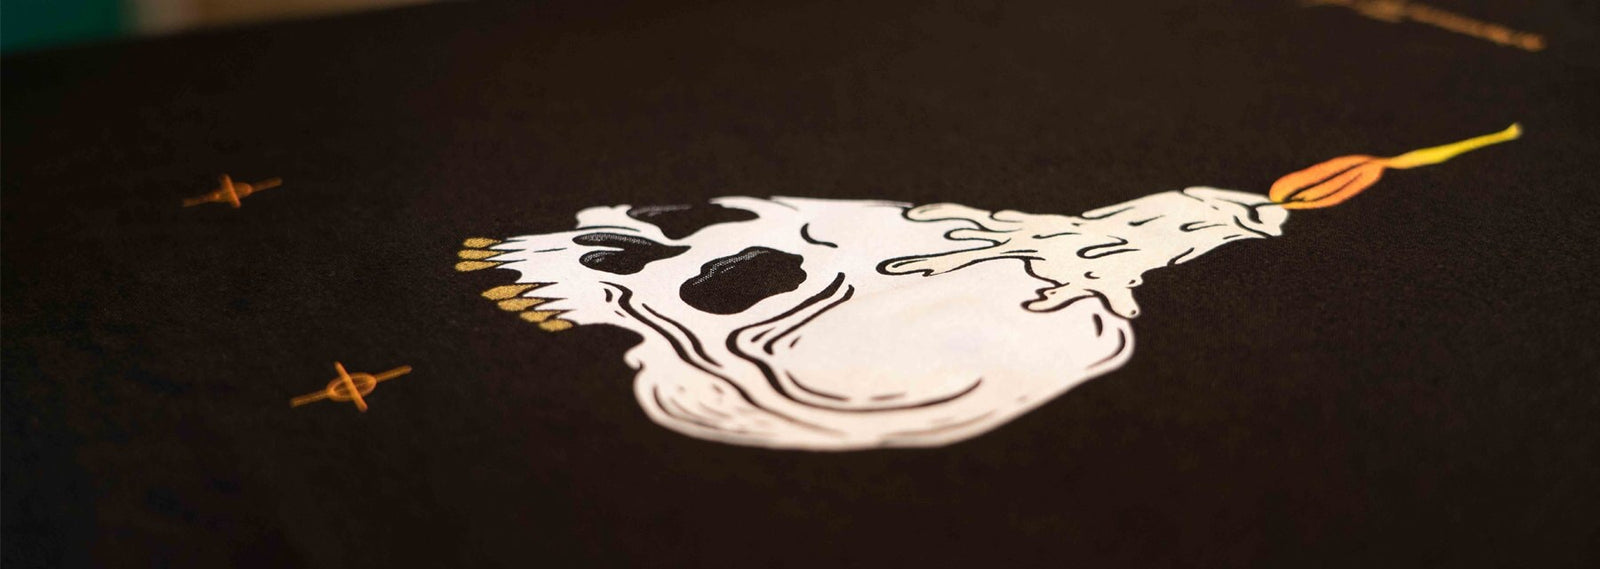
For this specific design, he did a few things differently. See how the candle is more off-white? He placed a 16% yellow tone on top of the white base to create the off-white look without needing another color on press.

Now that we're really looking at the design... Do you notice the color of the teeth? The teeth will also have a white base but Colin has a little bit of orange and yellow on top of it to create that gold color. Essentially, Colin used his three main colors to manipulate and produce two new colors. No need to add two more screens to the mix, no need to mix up two new colors. It's as simple as getting creative with the tools you got to make a cool, colorful print.

LINING UP FILM ON THE SCREEN
When printing a multicolor job, aligning the film perfectly on each screen is challenging. Colin has a few tips for you.
First, you want guides on the sides of the screen and a stop point on top of the screen. (A registration template is extremely helpful during this process.) Colin has a point marked in the middle of the top line in template that shows where he needs to put his top registration point. He places the registration marks on the exact same place on each film to maintain consistency.
Secondly, place tape on the film so when you lay down the screen on the film, the sticky side of the tape will adhere to the screen. Line the film up on the template.
Next, grab a screen. Lean the screen against the stopping point. Center the screen between the two guides on the sides. Push down on the area where the tape is to stick the film to the screen.
Lastly, pick up the screen and double check that it is centered. Rinse and repeat.
SMOOTHING SCREEN
To make a print smooth, use a smoothing screen. Making one is super simple. All you need to do is take a screen, coat it, dry it, and expose it. Done. You have a smoothing screen.
After creating the artwork and prepping the screens, it's time to print.
Colin goes in-depth about registering a multicolor print on a press that doesn't have micros on it. If you're printing with a Riley Hopkins 150 Press or a press similar to it, definitely watch that video. (If you have a press with micros, like the Riley Hopkins 250, check out this video about registration.)
Besides registration, let's take a look at the print itself. Colin uses FN-INK™ and prints the design on SanMar's DT 104 shirt.
Colin first prints the white base with two passes, flashes it, smooths it out with the smoothing screen, and prints again with one pass.

Pro Tip: Single platen press users, listen up. It's important to keep an eye out on the temperature of the platen. The more you flash, the hotter the platen will be, which means the platen will need more time to cool down. Keep a laser gun by you to check up on the platen's temp after each flash. Once the flash hits around 180°, it's time to let it cool off. If you reach 200°, you could cook the ink and witness strange effects.
Next he prints the orange and then the yellow, wet-on-wet style. The end result is magic. You have a five-color print that only needed three colors. Pretty rad, right? If you have any nifty tricks up your sleeve, we want to know. Tag us in your posts on social media. We'd love to share your sick prints with others on our platforms!


