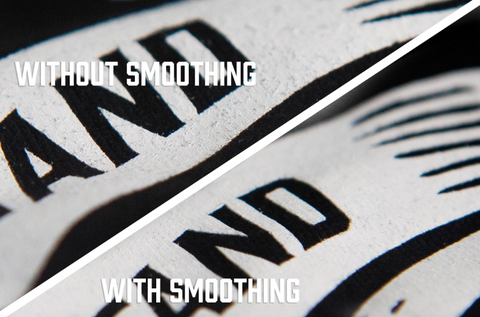
Printing white ink on black shirts is a popular design combination. For this design choice to be most effective, the ink needs to be clean and bright. For the best results, printers should use a smoothing screen. Want to learn how to do it? Print expert Colin Huggins has the answers.
SETTING UP
When printing white ink, use a screen with 156 or 157 mesh count. This will allow enough ink through to create a good deposit, but not too much that the ink smashes out and ruins the design edges.
Obviously, you’ll need some white ink. In the video, Colin uses FN-INK™ white. It’s a low-cure white that prints like a dream. Set up your flash dryer as well — you’ll need it too. The last main ingredient is shirts. Choose whichever black shirt you like the most. In the video, Colin chooses District Made DT104 shirts from SanMar.
RELATED: 20+ T-SHIRT TERMS EVERY SCREEN PRINTER SHOULD KNOW
THE PROCESS
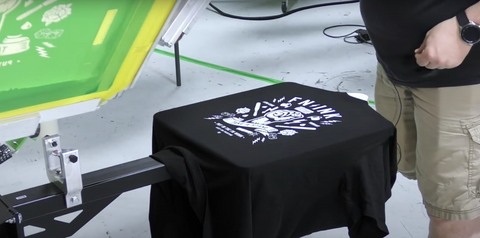
The first step, warm up the platen. Place the platen (with the shirt on it) under the flash dryer and let the platen hit about 120°F. By warming up the platen, the heat will transmit to the ink, making it easier to print. Remember, preheating a shirt causes the moisture in the shirt to evaporate, which fluffs up the fibers a little. We'll address how to fix these fluffy fibers in a bit.
Flood the screen and print. If you're using thin thread mesh, use light pressure to clear the ink through the screen. If you're using standard mesh, you'll have to use more pressure. Flood and print again.
Now, send that platen over to your flash. Keep it under the flash long enough for it to gel. You want the ink to be soft and pliable. Different factors like how warm your platen and ink are will dictate how long it takes to flash them. You'll have to test to determine how long it needs to be under the flash for the ink to gel.
Once the ink has gelled, it's time to use the smoothing screen.
RELATED: THE DIFFERENCE BETWEEN WOOD AND ALUMINUM PLATENS

USING A SMOOTHING SCREEN
A smoothing screen mattes down the fibers of the shirt. Smoothing the print helps boost the vibrancy of the white ink. There are a few routes you can take to get a smoothing screen. First, you could purchase a Heat Resistant Non-Stick Sheet and a roller squeegee.
If you're a DIY printer, all you need to do is grab either a 200 or 230 mesh screen, coat the screen with emulsion, expose it without any imagery on it, and place it on the press as a blank screen. You're going to need a clear lubricant like Curable Reducer or mineral oil: something that is liquid and is less likely to start to gel from the heat of the ink.
When using the smoothing screen, you'll want to use enough pressure to flatten the fibers, but not too much where you're jamming it in.
Flood and print one more layer of ink. Lastly, it's time to cure it. When removing the shirt from the platen, make sure to pull the bottom up first and then pull from the top. The goal is to avoid distorting the image. Run the shirt through the conveyor dryer or cure it with the flash dryer. If you're using a flash to cure garments, learn about the techniques to ensure the ink reaches the cure temp properly.
RELATED: HOW TO PROPERLY CURE PLASTISOL INK WITH A FLASH DRYER

There you have it. Now you know how to print white plastisol ink on a dark garment that'll result in bright, clean, and flat white prints. To learn more printing techniques, check out some free education like How to Screen Print With a Kit: 150 Edition. It’ll teach you the basics of screen printing, from setup to reclaim.

