
Hey screen printers! In this video, Darryl is going to walk you through the process of how to register your screens accurately and fairly simply using some unique tips. Let's jump right into it!
Setting Up Your Pre-Registration

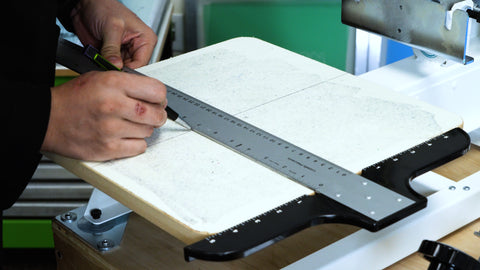
First, we start by using the reference points on the Pre-Registration template to align everything. We'll center the design using the center lines without worrying about other registration marks for now. Here's the breakdown:
- Tape to the Template: Secure the film to your template so it doesn't move.
-
Align the Screen: Use two reference points, one along the side and a straight line across the bottom. An L bracket can be helpful here for consistency.
Key Tip: Carefully align the template and secure it with tape to ensure it doesn't shift during the process
Tracing The Registration Marks

Next, we'll trace the design onto the screen:
- Tape Over Registration Marks: Fold over one end of the tape and secure it over your marks.
- Trace Carefully: Use a fine pen for accuracy. Draw a small "carrot" mark at the top for reference.
- Repeat the Process: Line up the film again, trace the bottom and top reg marks, and repeat until all marks are transferred.
Key Tips: Fold the tape, trace the design accurately, and use the carrot marks to ensure you’re consistent with the top and bottom of your screen.
RELATED: Taking The Screen Printer Starter Press To New Limits
Registering on Press
With the screens prepped, we head to the Screen Printer Starter Press:
- Mark the Center Line: Measure and mark the center line on your platen.
- Clamp and Align: Secure the clamp head and align your screen using the registration marks. Tighten it carefully to avoid movement.
- Fine-Tune: Adjust as necessary. Remember, tighter and thinner lines on your platen and screens mean more accurate registration.
Key Tips: Pay attention to when you tighten the knobs and the shift of the screens, tighten left and right together to minimize shift.
Printing Tips

Left side is after trapping/right side is before.
For the final touches:
- Trapping: This technique involves a thin black outline that overlaps the other colors, ensuring everything locks in place perfectly. In the image above, the right portion was before trapping, left portion is after.
- Flash Times: Different colors may require different flash times. Adjust based on the size and coverage of each part of your design.
RELATED: Which Flash Is For My Shop?
FINAL TIP: ALWAYS TEST PRINT & WASH TEST!
Make sure you wash test your cured garments to ensure your process is dialed.
Practice makes perfect in screen printing. The more you work with these techniques, the better your results will be. Thanks for following along, and happy printing!