Screen printing is a creative industry, where the only limit is your imagination. Well, not the only thing: sometimes it’s the equipment. Have you ever wanted to print a design on the entire back of a t-shirt, but didn’t have the right equipment or supplies to pull it off? Oversized prints are bold and draw attention no matter what you print. But in order to do it right, you need the right tools. Let’s take a look at what oversized prints are and how to print them properly.

HOW BIG IS “OVERSIZED”
Oversized prints refer to anything larger than a standard screen size. Most printers use 16”x20” or 20”x24” screens for most jobs. Usually, a 20”x24” will fit whatever you’re trying to print, whether that’s a back design, left chest print, or a sleeve print.
If you’re wanting a print bigger than will fit on a 20”x24” screen, it’s oversized. If a print is pushing the limits of your screens and platens, it’s oversized. In order to print oversized designs with confidence, there’s a few supplies you’ll want in your shop arsenal.
THE DARKROOM
Oversized prints start with the screen creation process. Here’s what you’ll need to make a great oversized screen.
FILM
Bigger prints need bigger film. For most jobs, the largest film you’ll need is 8.5”x11”. If you’re creating a massive design, you’ll need a bigger film. Grab some 13”x19” film to get the job done. Make sure that your film printer is large enough to print a bigger film.
Pro Tip: One workaround to using standard film when printing oversized prints is to split the design and print it on two regular-sized films. While this may work, it’s very difficult to line up the two films perfectly. You’ll save a lot of time and effort by using larger film.
SCREENS
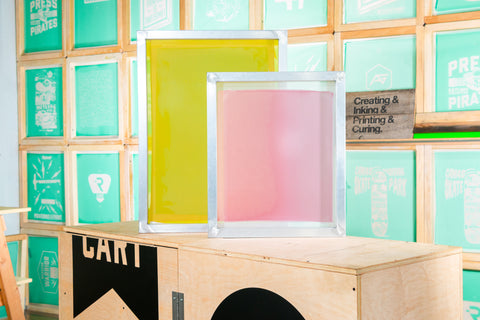
Once the film is printed, you need to burn it on a screen. Since the design is oversized, the screen needs to be oversized too. Since standard prints fit on 20”x24” screens, using a 23”x31” screen will do the job. Having a taller screen means you can fit that giant print on the screen with no issues. Make sure that there’s enough space around the design so the screen can easily lift off the shirt as you’re printing.
RELATED: HOW TO MAKE A BETTER SCREEN FOR SCREEN PRINTING

EXPOSURE UNIT
Larger screens require a larger exposure unit to get the job done. If you're using a smaller unit, you won't be able to expose the large image onto the screen. You'll need larger exposure units like the X2536 LED Exposure Unit, V2331 LED Exposure Unit, or the Y3942 LED Exposure Unit. With a larger exposure unit, you’ll be able to place the entire image area in the sweet spot of the exposure unit.
ON-PRESS TOOLS
Once your screen is exposed, rinsed out and dried, it’s time to get printing. What do you need for a successful oversized print?
SQUEEGEES
To print an oversized design, you need bigger squeegees. Having a larger squeegee means it will clear the image area easily and consistently. The squeegee you choose should be at least an inch wider than the image you’re printing on either side. Squeegees come in many sizes, so you won’t have a problem with finding the best one for your job.
A great starting point for printing with sizeable squeegees is 15”. Once you start printing bigger and bigger designs, you’ll want to keep the squeegee 1”-2” wider than the design. A 16” or 18” squeegee can handle pretty much any oversized job you’ll be printing on a manual press.
PLATENS
If you’re printing a design that’s bigger than the platens on your press, you’re going to have problems. The good news is that platens come in all shapes and sizes. The standard platen size is 16”x16”. Check to see what you have on hand and the dimensions of the print. If your image area is going to be bigger than your platens, you need a bigger platen.
But which type of platen should you buy? With both wood and aluminum options, there’s a lot to think about. Wood platens are more economical, but will warp over time and don’t hold heat as well as aluminum platens. If you plan to run lots of oversized jobs, aluminum platens are your best bet. If oversized prints aren’t a standard job in your shop, wood platens will hold up just fine.
RELATED: THE DIFFERENCE BETWEEN WOOD AND ALUMINUM PLATENS

FLASH DRYER
The last piece of oversized equipment you’ll need to print with ease is an oversized flash dryer. A large flash unit will emit more even, consistent heat across the entire print. If you don’t have an oversized flash to gel the entire print at the same time, you’ll get an uneven cure. Having a large flash unit like the Riley Flash Dryer 18”x24” will do the trick.
If you have two smaller flash dryers, you can set them up so one flash catches half of the print while the second flash catches the other half. This method can work, but requires a little coordination, and doesn’t guarantee that the ink will gel consistently.
RELATED: HOW TO PROPERLY CURE PLASTISOL INK WITH A FLASH DRYER

Getting the right tools for the job feels good, and helps you get the job done faster and be more confident about accepting more oversized jobs. With so many more options to offer customers, and better equipment to meet deadlines, you’ll be hustling even harder. Show off your art and skills with oversized prints, and get the right tools to pull it off in style.

