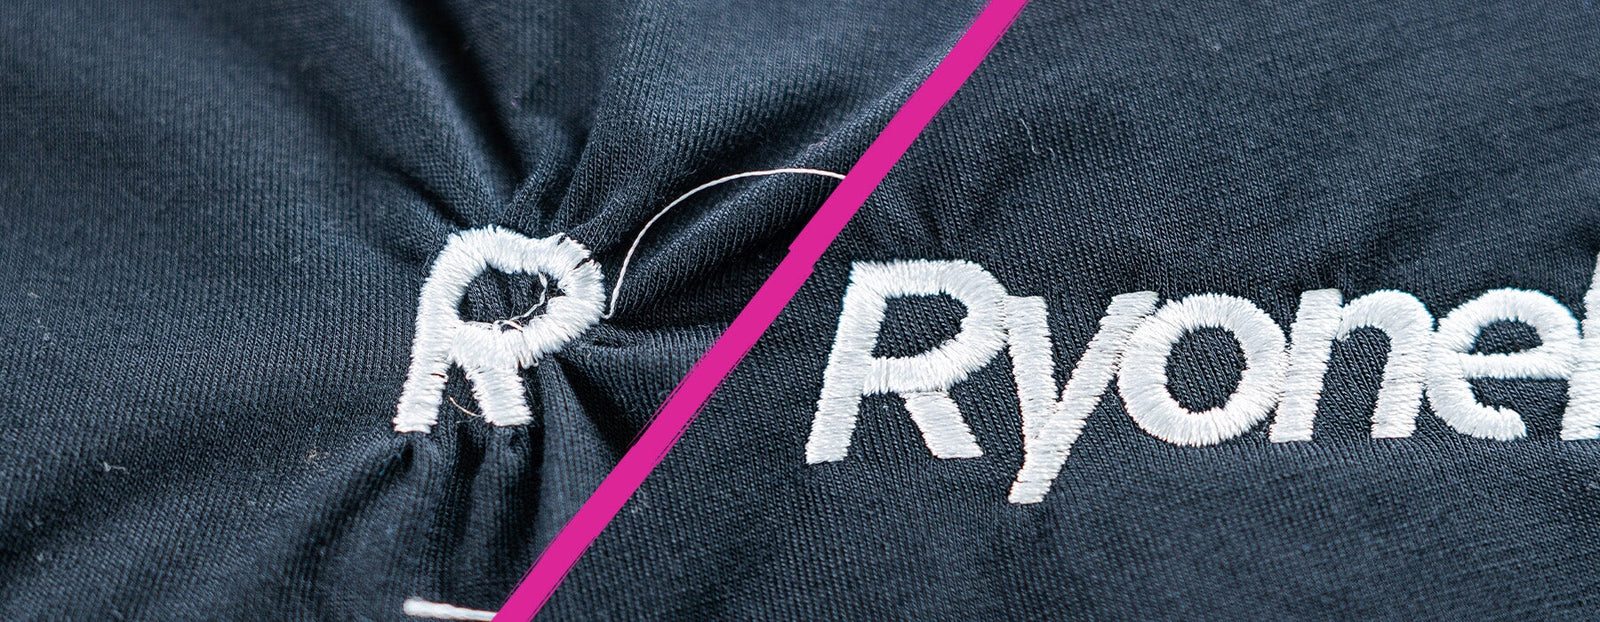
Embroidering on polos isn't as easy as it seems! The fabric weight, placement of your design, and even the backing you use can make or break the final product. Today, we’re diving into the world of polo shirts using the ZSK Sprint Classic Embroidery Machine, breaking down how to line them up, the different fabric weights you’ll encounter, and most importantly, how to avoid that dreaded puckering.
SETTING UP YOUR HOOP
The first step to a perfectly embroidered polo shirt is setting up your hoop correctly. If you’ve got a tool like the HoopMaster, you’re already ahead of the game. Here’s a quick guide:
- Position the Hoop: Start by placing the bottom part of your hoop in the HoopMaster. This is where the magic begins!
- Add Your Backing: For adult-sized polos, especially smaller sizes like an Adult Small, you’ll want to secure your backing tightly. It holds the fabric in place, preventing movement that can lead to puckering or misaligned designs.

- Align the Shirt: Once the backing is set, position the shirt so that the hoop is in the area where your left chest print will go. The key is getting it centered, but don’t worry if it’s not perfect yet—you’ll fine-tune the position soon.
- Tighten the Hoop: Snap the top part of the hoop in place and make sure it’s snug. A well-tightened hoop is essential for clean, crisp embroidery.
RELATED: HOW TO CREATE STUNNING 3D PUFF EMBROIDERY
FINDING THE PERFECT PLACEMENT
Now that the shirt is hooped up, it’s time to fine-tune the placement of your design. You want to get that left chest logo sitting perfectly. Here’s how to do it:
- Don’t Go for the Center: While it might be tempting to place your design right in the center of the hoop, it’s better to aim higher—closer to the top of the hoop. This will give your design that perfect spot on the chest, rather than awkwardly sitting too low.

- Test the Placement: Many pros use a cardboard mannequin to visualize where the design will sit on a human body. Place a sticker on the mannequin where you want the design, and use this as a guide when positioning your hoop. This method helps avoid awkward placements and gives you a better idea of how the final product will look.

TACKLING PUCKERING
Let’s talk about one of the biggest challenges when embroidering polos: puckering. This happens when the fabric bunches up around the stitches, ruining the smooth, professional look you want. The type of fabric and backing you use plays a huge role in this. Here’s how to solve it:
FABRIC WEIGHT MATTERS:
- Heavyweight Polos: These are usually more forgiving. A simple tear-away backing will often do the trick.
- Thin or Lightweight Polos (like dry-fit or female-cut styles): These are the trickiest. Without the right backing, they tend to pucker a lot. For these fabrics, it’s best to use multiple layers of cut-away backing. Yes, it’s more work, but the result is a smooth, professional design.

RELATED: HOW EMBROIDERY CAN TAKE YOUR BUSINESS TO THE NEXT LEVEL
BACKING CHOICES:
- Tear-Away Backing: Good for heavyweight fabrics, but it can cause puckering on lighter materials.
- Cut-Away Backing: For thinner garments, go for four layers of cut-away backing. This might seem like overkill, but it’s the best way to avoid puckering.
- Puff Embroidery: Surprisingly, puff embroidery—where you add a layer of foam under the design—can sometimes prevent puckering. If you haven’t tried puff embroidery, give it a shot! It might just surprise you, like it did for me.
WRAPPING IT UP
Embroidering polos, especially when dealing with different fabric weights, can be tricky. But with the right tools, techniques, and a little patience, you can create stunning designs that don’t pucker or warp. Now you’re ready to tackle those polos with confidence!

